A free GUI for electronic documentation of on-going tests
at A2LA certified testing laboratories.
home: http://starling.us/tet
by Ĝan Ŭesli Starling
copyright 2003
The Test Log GUI is a script for authoring test log documents. The document format is plain ASCII text. Records are line-delimited. Fields are tab-delimited. The test log document may therefor be opened in any text processor (such as Wordpad) or any spreadsheet (such as Excel). It is fully user-configurable: Name the test logs however you like; Include as many fields as you like named in any way that you like. It is even multiply configurable: create different configurations for different tests...just as many as you like.
The user-configured GUI will:
So by means of this GUI you can replace all your old-fashioned, user unfriendly, one-size-fits-all, Xerox copies of spreadsheet forms with a clean and efficent, modern, electronic format. Easy to store and to archive. Easier yet to retrieve and to search. Imagine not having ever again to leaf through any dog-eared pages in search of an entry. Or once said entry be found, not having to decipher the hand of a technician away on vactation. More importantly yet, technicians will be more inclined to illuminate important details once freed from the constraint of crabbing their scrawl into the limited space of some boxed-in field on paper. Better quality test log notes, custom tailored for every test, all from a single Perl/Tk script, all for free.
Not a software guru? No problem! This is a brain-dead simple how-to. The write-up seems long only because of exhaustive detail.
Monospace in this color denotes command-line arguments (if any), file names and/or short excerpts from either.
Monospace on this background denotes entire files, whole lines from files and/or complete cli sessions (if any) with commands you enter darker than OS output such as the prompt.
The GUI itself is nothing but an oversized Perl script, divided into about a dozen modules for ease of maintenance. So the gus_log_pl.zip file to be downloaded shortly will unpack neatly into a single directory, which you may locate to any file path that suits your whim. Can it get simpler than that?
But because the GUI is written in Perl it is not a stand-alone *.exe file. Perl scripts require a background utility called the Perl interpreter, which is free, but does not come pre-built into Windows. This interpreter must be separately installed. That installation is also simple, but requires an administrative password on WinNT and Win2K. If on a network you may need to beg a sysadmin from your IT department to install it for you. Once that is done however, you may install any further handy little Perl scripts you like as these will run from the Perl interpreter already installed!
As mentioned, to run any Perl script you’ll need a interpreter for Perl. For Win32 there are several to choose from. Personally, I recommend the free one from ActiveState.
If your IT department’s sysadmin has not put up stumbling blocks in your way (via restrictions on the corporate proxy server/firewall) then just obtain Perl directly from here: Perl download page
If the easiest and best way above still does not work out, then break down and buy the ActiveState CD-ROM which as of this writing costs a whopping $39.95. (FYI: Said CD-ROM also contains a bunch of other way-cool utilities which are not free but require a license. Resist the lure of those other goodies and you’ll not be put in debt any further.) So, and only as a last resort, obtain Perl on CD-ROM from here: Perl on CD-ROM
A link to their documentation also exists on their download page. But just in case some folks might get lost, I present another redundant link here: Installing Perl
Once again, it may possibly be that your IT department’s sysadmin has restricted your ability to install Perl yourself. In that case you’ll just have to whine at them to do it for you. Explain the advantages of my Test Log GUI and hopefully they may come around.
Nothing could be simpler. Just download and upzip from here: gus_log_pl.zip
Once unzipped, relocate the directory gus_log_pl to wherever you like. Then create a shortcut to the file gus_log_menu.pm and put the shortcut wherever you like.
If you chose ActiveState for your Perl interpreter, then now also do like so. With your shortcut in place, now modify it slightly. Its properties will, by default, have it pointing to c:\perl\bin\perl.exe as the interpreter. Change that from perl.exe to wperl.exe and the whole busines will work a touch nicer. By nicer I mean that you not see an empty DOS console pop up when you run the script. By default, Perl likes to have a console. But this script is entirely GUI. So the console is only redundant. Repointing the shortcut will get rid of the console.
Included are a few examaple configurations. Before custom tailoring your own, may I suggest first toying with some of mine? Click on the shortcut which you made after installation. A menu will pop up listing various XML files. These are the configurations. Chose any one of them and see what you get. Then use the pull-down Help menu to view the current XML config in a web browser and see what’s inside. Observe how the two relate.
Soon as you feel confident as to how they relate, reopen said XML config file in any text processor (such as Wordpad) and save a copy, with your own edits, under a different name: foo.xml for instance. Then start a new test log GUI and choose your own new file from the menu of configs. Fear not as nothing you do by way of messing up that config file can do worse than crash the GUI, and that only for a given session.
<gus_log>
	<about>This example maximalist XML config file tweaks nearly everything.</about>
	<widths>13,15</widths>
	<browser>C:\Program Files\mozilla.org\Mozilla\mozilla.exe</browser>
	<menu>
		<view>
			<file>.\maximalist.log</file>
			<file>..\..\some_file.txt</file>
			<file>C:\Documents and Settings\John Doe\My Documents\foo.txt</file>
		</view>
	</menu>
	<path>C:\my_test_data\</path>
	<log>example_test.log</log>
	<title>1-Channel Fatigue Test</title>
	<show>7</show>
	<hdr>
		<row>
			<col>Work Order</col>
			<col>Part ID</col>
			<col>Samp ID</col>
		</row>
		<row>
			<col>MTS Station</col>
			<col>MTS Params</col>
			<col>MPT (*.000)</col>
		</row>
		<row>
			<col>Pass/Fail Mode</col>
		</row>
		<row>
			<col>Peak</col>
			<col>Valley</col>
			<col>Freq</col>
			<col>Temp</col>
		</row>
		</hdr>
	<ftr>
		<row>
			<col widths="13,5">Pk N</col>
			<col widths="8,5">Val N</col>
			<col widths="8,5">Pk mm</col>
			<col widths="8,5">Val mm</col>
		</row>
		<row>
			<col widths="13,9">Cycles</col>
			<col widths="8,9">Temp</col>
			<col widths="8,9">Tech</col>
		</row>
	</ftr>
</gus_log>
The above XML file determines how one particular gus_log_pl GUI will look. The script will build a Perl/Tk GUI with pairs of label and entry widgets. Entry widgets contain user entries. Label widgets identify those entries with a name. So tailor another such XML file to custom create your own electronic test log GUI.
<about> node is optional. The script ignores it. Use it to describe its purpose of this config.
<widths> node is optional. Use it to change the default widths for the lable and entry widgets.
<browser> node is optional. Use it to specify a viewer other than the default browser for XML and text files.
C:\Program Files\mozilla.org\Mozilla\mozilla.exe
<menu> node is optional. Use it to nest specific menu sub-nodes:
<view> node is an optional child of the <menu> node. Use it to nest <file> nodes for the View menu.
<file> node is a required child of the optional <view> node. Use it to add a file to the View menu. Add as many files as you like. File paths may be either absolute or else relative to the directory of the current log. If in the same directory, current path delimiters (.\foo.txt) are not required (but recommended so as to be clear to the user).
<file>.\specimen.log</file> and perhaps also <file>.\foo.dat</file> nodes here.
<path> node is optional. Use it to specify a default directory path for the log.
<log> node contains a name for the output text file. <title> node gives a default name for the title bar of test log GUI window. User can change this later.
<menu> node lists which among the entry widgets from the footer will display should ever the Show button be clicked. Comma delimited integers are what (if anything) must go here. Innumeration is from top left across, and so on down to bottom right. This feature works by reading back from the log and parsing out certain entries for a quick on-line, review. Any entries which you wish to not be so readily available, disinclude their number here. <hdr> and <ftr> nodes segregate header rows from footer rows. The header is constants that define the test. The footer is for variables, observations taken during the test. <row> node delimits a row of label/entry widget pairs. <col> node contains the label which will identify a datum you want to be recorded. Each such label will pair at left beside a blank entry widget.
widths="i,j" attribute may be included.
i and j are integers. Just like for the <widths> node.
<widths> node, only local instead of global.
The best way to illustrate what you can change is with yet another example. Here is an absurdly minimalist config file.
<gus_log>
	<log>minimalist.log</log>
	<title>My Test Log</title>
	<hdr>
		<row>
			<col>Objective</col>
		</row>
	</hdr>
	<ftr></ftr>
</gus_log>
I suppose you could even do without even a single row in the header. Despite the footer being empty, a notes text widget will nevetheless appear by default. So you see that the rows and columns in both the header and the footer are totally configurable.
There are one or two subtle things which can possibly go wrong. Usually they will not go so wrong as to halt building of the GUI. But appearances might not end up just how you like.
One potential pitfall awaits those who over-punctuate. I parse these XML config files with Perl’s own very ordinary regular expressions...not by way of the more esoteric XML-ish Perl modules. So if a GUI crashes right after selecting a particular config from the XML config file menu, look first to your punctuation and consider reducing it until the problem goes away.
Another pitfall that won’t crash the GUI but will very disturb its appearence is if your XML is not well formed. That is to say, the node tags have been mis-matched. A very simple troubleshooting tool is to open the file in a browser (such as Mozilla, Netscape or MISE). Those three can also parse XML. They’ll show you the file, all prettied up, if it is indeed well formed. They will complain and give detailed info on any lack of well-formedness. In short they will pinpoint the error for you.
There’s not very much to using the GUI. It may not do so very much. But those are accomplished elegantly, as you will see. Happy loging.
Just click on the shortcut which was made by whoever did the installation...the one which points to gus_log_menu.pm.
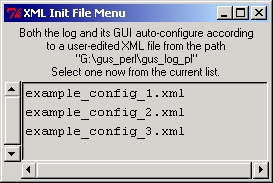
A window will pop up (screenshot) asking you to select from among a list of current *.xml config files (as authored by you, or by your boss, or his boss...whoever). Click on one and the GUI will build to its specifications.
Note: In the example screenshot, a path is described for those example configs. Your path will be different. The window reports whatever path you happen to have installed them in.
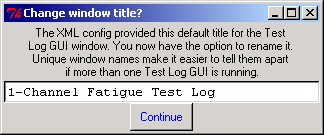
Another window will pop up (screenshot) to offer the option of changing the window title. Displayed will be the default title if nothing is changed. This default title was set by the XML config.
Why this option? If you run multiple Test Log GUIs, all from the same XML config, their having each a unique window name avoids confusion. Otherwise you’d have to read their header entries to tell one apart from another.
Note: This step is optional, intended primarily for new users.
From the pull-down menu Help select the feature Toggle popup hints. This feature will aid beginners with pop-up hints about various features of the Test Log GUI. Re-select the same menue sequence again to toggle this feature off.
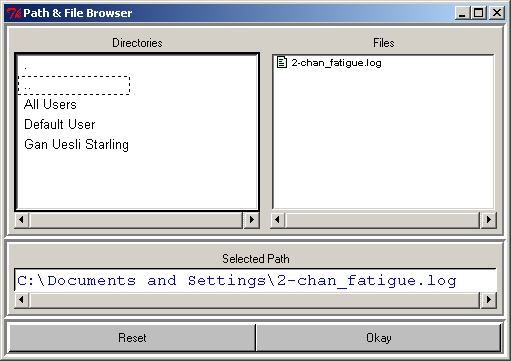
Any log now to be opened will be, by definition, a child of the current XML config. The current XML config, as the parent, names all these logs the same. Only one file so-named may exist in a given directory. Thus will the Open button cause a window to pop up (screenshot) for browsing through directories for files matching only that name.
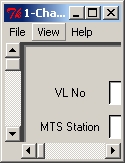
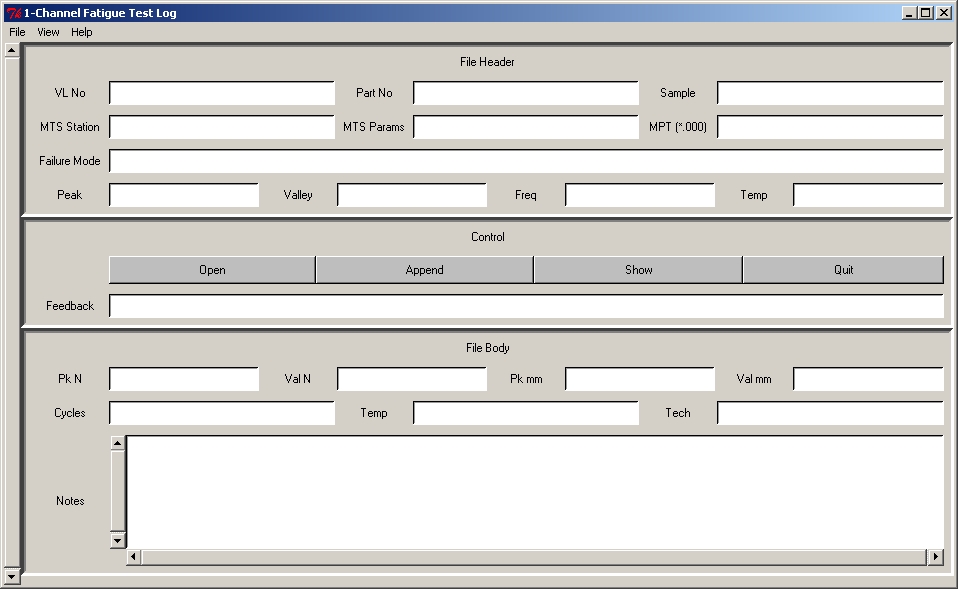
When at the directory of choice, click Okay. The main Test Log GUI window will now pop up (screenshot) semi-minimized. Drag the lower right corner to expose its full contents (screenshot) . Or at your option, drag to a partial, in-between size, and use the scrollbars.
As of this point, nothing will have yet been written to the log. But the path to which it shall be writtin now should have been selected. As noted above, this path ought now be displayed in the feedback widget. Make doubly sure that it is correct.
When the main window has opened. First take note of the feedback widget in the controls frame, near the middle, under the buttons. Look for confirmation of the path you browsed to. If text overruns the boxe, use the Arrow, Home and End keys may be used to scroll the widget right & left. If message text is not as expected, pull down the View menu and check Feedback history for prior error messages. (FYI: The feedback window only shows the most recent message. If the XML config held bad options, a prior error might have occured.)
When as may happen, some identically-named prior log file already exists in the opened path, that file will be re-opened. In such case the header data entryboxes will auto-fill with last-saved entries from said prior test log file. Re-loaded header entry data will present in red. The red had ought to suggest you review them, since they are in fact old data.
If no prior like-named test log waits there to be re-opened, then the header entryboxes will remain blank.
Whoever authored the XML config for this particular GUI wanted certain data included. An entrybox exists for each datum. Not a one may be left blank. The GUI will refuse to append until each has something typed in. (FYI: Entryboxes each display with a finite width. This however is no contstraint upon content length. Entries are permitted to overrun their box. As with the feedback widget, use the Arrow, Home and End keys may be used to scroll the box right & left.)
Click on the Append button and all your entries will be saved to the directory which you had opened, under the file name chosen by the XML config file’s author. That is to say it will be appended. No prior data will be overwritten.
Upon the very first append, header entryboxes will all ghost out (become inactive to the mouse, turning gray to so indicate) after the first append. Why? Because these header data define the test and are therefor regarded as constants.
To un-ghost the header, re-open the log file afresh. To start a new log file with near-identical header entries (as for the Nth sample of a test) re-open a prior near-identical log file so as to load its header entries. Then open again to a new directory. Since you have yet to append, the header entries will be carried along non-ghosted.
After the first append the header may cease to be of interest. Yet it takes up a lot of space. Click on the View pull-down menu and select Toggle header to hide and re-show the header frame at will.
Similarly, the entryboxes in the footer will be refreshed. That is to say they’ll be emptied out. This is so because they’re considered variables. Future appends must all be fresh, deliberate entries. Nothing therefor is carried over in the footer.
There are two ways to view prior entries, a select partial view with the Show button, or a full view with the View pull-down menue.
Most often you’ll need to see only what the author of the XML config file has thought most important. (Those called out in the <show> node of the XML config file.) Click the Show button to display them in a browser window.
Sometimes however you may want to see the whole log file. Click on the View pull-down menu and select for the current log file. The log will come up displayed in a browser.
FYI: So as to better employ the browser’s display capabilities, the View pull-down menu and the Show button each write temporary *.html files into the currently open log file directory. These both are overwritten with each successive re-display and deleted via the Quit button. If for any reason you need to preserve them, just perform a Save As from the browser.
Nearly every button clicked since first the Test Log GUI was opened gave a report in the control frame’s feedback widget. A history array is kept of all feedbacks for so long as the GUI stays open so that past actions may be reviewed.
Suppose that a distraction occurs so that it cannot be remembered what was done last. Click on the View pull-down menu and select for the feedback history display. All will then be revealed.
Note the Save button at the bottom of the log history window. Clicking this will write a history file into the currently open log directory. This file will be named log_history_YYYY-MM-DD_HH-MM-SS.txt to signify the year, month, day, etc. for start of session. Any subsequent click of the button will over-write the same file, in effect updating it. Once (over-)written, the feedbacl history window will close. A browser window will then open to show the newly (over-)written file.
Click the Quit button to exit. Know that in order to quit the footer entryboxes must either all have data or all be empty. This is because data in any of the footer entryboxes will trigger a final append on quitting. A problem report in the feedback widget will interrupt the GUI from quitting.
Some few caveats apply to those who would administer the Test Log GUI, or any who might need to ex-post-facto edit the log files which it creates.
If you create a variety of XML config files, each will comprise a separate format, each for a different kind of log. Particularly so if the header arrangement should vary. Best not to store differing formats under identical filenames. Force them to differ by way of the <log> node in each one’s respective config. This prevents users from mis-interpreting one file format for another when browsing for file names they want to open.
If you change an existing XML config, then in effect you are changing the format. Should you alter the header arangement, again the same parsing difficulties may arise as for multiple configs.
To insure against any loss of data, log files are saved as tab-delimited, pure ASCII text, which is virtually incorruptable. Further, no accidental deletions or overwrites are possible because the GUI can only append. Deliberate corruptions are however possible by way of some other editor program. The GUI does not put a lock on the file, so cannot prevent another program from opening it. This would be pointless since all anyone need do is close the GUI meanwhile. Thus editing is possible no matter how the GUI might otherwise strive to prevent it.
But know that to edit a log (mid-stream or even ex-post-facto) is taking a chance. Should you only wish to open and copy data out from a log, then allow the GUI to assist. Open said log in the GUI pull-down its View menu and select Current log. This is the safest way.
Know that to open any pure ASCII log in most of the common editor programs is unwise. Why? Because WordPerfect, MSWord, WordPad, Excel and their ilk save by default in binary. The Test Log GUI cannot re-open a log file once is binary, not at all. If ever you edit and re-save log with binary in it, then you’ll be done with the Test Log GUI as far as that one log is concerned. Only do so if you are absolutely certain to re-save it as pure, TAB-delimited ASCII. If less than certain, then best not to try.
The above caveat on editing pure-ASCII content will, of course, no longer apply once the test is completed and you are wholly done with the Test Log GUI. Then, most likely, you will want to display it in a spreadsheet program. As a tab-delimited, pure ASCII text file, you can do so easily. Tab-delimited ASCII text will open into a number of spreadsheets: Excel, Gnuemric, etc.
Or you might prefer, as a final act of the Test Log GUI, to view the log by way of the pull-down View menu, selecting Current log to open a temporary copy of the log translated into HTML. Click Save As in the browser to preserve the log under some other name. Some small advantage to this is that the HTML is is merely a copy, and identifies itself as such. So more than just being a wee bit harder to edit, interested 3rd parties (potentially nefarious by definition) are insulated from altering the original. And further, as a legality, any copies which exist must be identified as such.
The Test Log GUI is updated periodically. Version IDs are by release date (modification date of most recent file in the ZIP archive). This document pertains to release 2003-11-04
Bug fixes in current, 7th release dated 2003-11-04 are:
Test Log GUI = foo.xml) written to new logs.Improvements in 6th release dated 2003-10-25 are:
Toggle pop-up hints has been added.
Improvements in the 5th release dated 2003-10-19 were:
Open now cascades into two options.
by matching name: foo.log option to browse for logs exactly matching the current XML config. by matching regex: .*\.log$ to browse for logs of a similar suffix.
Test Log GUI = foo.xml
Header now cascades into two options.
toggle visibility option to alternately show or hide the entire header frame. toggle ghosting option to alternately in- and re-activate all header entryboxes.Improvements in 4th release dated 2003-10-12 were:
<path> node for validity.
<browser> node for validity.
<widths> node. Globally override the built-in default widths of label and entry widgets. <col> node provided with an optional widths="i,j" attribute. Override the default widths of label and entry widgets on a local, per-widget basis.Improvements in 3rd release dated 2003-10-05 were:
*.log extension. To adjust it required an admin login. Not all users had this right. *.html files to the current directory. These are deleted when quitting the GUI. <menu> node with a <view> sub-node. Add user-specified files to the View menu list.Improvements in 2nd release dated 2003-09-20 were:
<path> node to pre-select the log file path. <browser> node to pre-select an alternate, non-default viewer.End users may employ this software to generate logs for any purposes whatsoever. End users may also modify the scripts in any way which suits their own individual needs. But no party whosoever may in any way re-distribute this script, nor any work deriving from it, nor from any module of it, without written consent of the author, namely me.
As with any free, open-source software, all the softwares herein provided and any instructions pertaining to them are each one provided AS IS with no guarantee whatsoever being made, suggested, alluded to or even vaguely hinted at. The end users assume all risks, including but not limited to the spontaneous disintegration of persons and prorperty into their component sub-atomic particles and the dissolution of these into energy with collateral damage to the surrounding acreage. Enough said? If this disclaimer fails to dissuade any legal eagles, know that the the sole and only asset of Trailing Edge Technologies is its registered trademark.
Respectfully,
Ĝan Ŭesli Starling
Kalamazoo, MI, USA
gan@starling.us